Friday, February 27, 2009

Served On A Siver Platter

WARNING:
Super Easy Project Ahead!


Simply print a monogram from your computer,
on regular paper (no need for card stock).
Then cut it out being sure to stay inside the black
so the white of the paper doesn't show.
Using a regular ol' glue stick, adhere the monogram
to a silver platter or china serving plate.
Of course, this is FOR DISPLAY USE ONLY.
When you're tired of the display,
just remove it by soaking it in water.
How's that for a quick and easy project?

Thursday, February 26, 2009

You Asked, I Delivered

***Edited to Add***
I feel so humbled that Kari and Kjisa
are featuring this post on their
"Psst...Your Creativity is Showing" segment.

Thank you so much Ladies!!!

Several of you wonderful ladies requested a how-to of the grain sack reproduction. You asked, I delivered.
First, decide how big you want your project. Next, use any computer program to make a pattern (I use Print Shop), or draw one by hand using a permanent marker.
Then cut the burlap just a bit larger than the finished project. This makes it easier to manage, as well as giving you an idea of where to place your pattern. Place the burlap on top of the pattern, and then lay both onto a light box (one of my favorite tools EVER). If you don't own a light box, then secure the burlap onto the pattern using straight pins and tape the two pieces onto a sunny window.
Using acrylic craft paint, simply paint on top of the pattern.
You can also use a store bought stencil, as I did to achieve this design.Be sure to remove your pattern while the paint is still wet so the paper doesn't stick to the dried paint. Once the paint is thoroughly dry, if you want a more aged look, you can lightly sand over the painted surface. It's just that easy to make your own personalized grain sack.
If these directions seem familiar to you, it's because I used a similar technique here and here
.

Wednesday, February 25, 2009

Unofficial Holiday

Can you see what's wrong with this picture?Yes, the door and trim are not the same pretty white
as the crown molding.

I'm embarrassed to admit that this has been the case for a while now. I don't even remember why I didn't paint it when everything else was painted. and because it's the back of the door, I only see it first thing in the morning when I'm running to do a dozen other things, and late at night when I'm ready for bed.
Please tell me that I am not the only person that leaves a little something to do on a project and then forgets to go back and finish the job.
Occasionally my husband will ask, "When are we going to paint that door?" (He says "we" even though he never does the painting.) I usually respond with, "I'll get to it."
Well, I am officially declaring today
a HOLIDAY.

It will be called "Why Not Wednesday!"
Today is the day I am going to get to
painting that door----FINALLY!
You can join me in celebrating today.
What project have you been neglecting?
When are you going to do it?
Why Not Wednesday!

And when I'm done painting,
I'll start working on the tutorial
you asked for.

Tuesday, February 24, 2009

It's Been Sacked

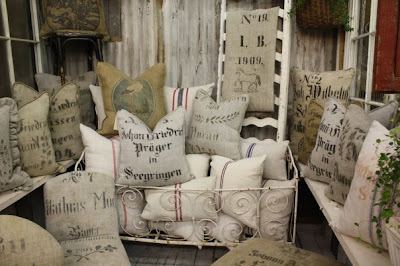
Antique grain sacks are so popular right now.
I decided to make my own version
using burlap and paint.
I personalized it to my family.
2 parents+5 kids=No.7
(Name has been covered to protect the innocent)
Our last name has Swiss origins,
so the word "family" is spelled the Swiss way.
I used spray adhesive to stick it
right on top of the old painting.

How's that for a change of scenery?
It looks much better than it did here.

Monday, February 23, 2009

The Fill In

Remember when I added an extra frame around my foyer mirror? Well, that left an empty spot in my decor where that frame had previously been. There was only one thing to do. Find a fill in. This is what I found.Of course, the frame was a little too gold for my taste, so I brought out the Rub 'n Buff to grunge it up.


After applying R 'n B, I gave it a good rubbing which revealed a little of the original gold. This gave the finish more depth and dimension. I think it now has the appearance of an old piece that's been found in an attic. I like it much better now.
I'm sure you're wondering if
I plan on keeping that nice painting.

No.
I am not.

I have other plans.
But that will be another post.

How's that for a tease?

Saturday, February 21, 2009

Photobucket

Photobucket
Photobucket
Photobucket
Photobucket
Photobucket
Photobucket
Photobucket
Photobucket
Photobucket
Photobucket
Photobucket

Cute bedside book storage.
Photobucket

Create a beautiful still life on an empty shelf.
Photobucket

Genius use of white gutters as book ledges!
Photobucket

Reduce visual clutter by arranging your books in colour order.
Photobucket
Photobucket
Photobucket
Photobucket
Photobucket
Photobucket
Photobucket
Photobucket
Photobucket
Photobucket
Photobucket
Photobucket
Photobucket
Photobucket